
I had the pleasure recently of installing a new starter in my 1964 E-Type OTS. I realize that changing starters on the 3.8 engine is regarded as one of the most difficult jobs possible, but I found that not to be so. Actually, it’s something anyone with a bit of skill and patience should find eminently doable.
There are, however, a few things to keep in mind when removing and installing the starter. First, it never hurts to take off one battery connection and also remove the 7/16th brass nut that holds the starter cable to the starter. Granted, there’s no current flowing to nor through that cable, but it never hurts to disable the car’s electrical system.
Let’s now turn our attention to the two bolts that hold the starter in place. To get at them, you do not have to remove the intake manifold. In fact, if you remove the black, cylindrical vacuum canister and the air cleaner—that is, the large, triangular silver structure and then that great black pot beneath it—you’re pretty much there.
Tackle the vacuum tank after you take off the air cleaner. You’ll have to get underneath the car to remove the aluminum plate beneath the vacuum tank, then work from below and above to undo the four 7/16th bolts that hold on the vacuum tank in place. (I temporarily put most nuts, bolts and screws back in their proper places.) In addition, you’ll have to take off the vacuum hoses at the top of the tank.
It also helps to detach two pieces of carburetor linkage: the actuator rod that runs parallel to the firewall plus the rod above the three carburetors. For the latter, you can merely remove the two bolts that hold that linkage to the firewall, pull the rod forward slightly and gently push the linkage assembly toward the engine. You don’t have to detach any linkage from the carburetors themselves.
At this point, you’ll have a clear view of the upper nut and bolt that hold the starter onto the engine. This one is fairly easy to get at with a 9/16th box-end wrench on the backside and a 9/16th socket on a long extension pointing forward (I’m quoting sizes of nuts and bolts on my car; yours might be different).
The bottom starter bolt is a little harder to get at, and you’ll again have to climb underneath the car. Be sure, of course, to use jack stands. The front of the lower nut/bolt assembly is easy to see and get at—it’s the backside that’ll give you grief. For one thing, you can’t see the rear of the bolt (well, maybe barely), and it’s impossible to reach your hand up in there. So, what I ended up using to hold the back of the lower nut/bolt ensemble was a quarter-inch ratchet, a short extension and a 9/16th socket. My particular ratchet wasn’t quite long enough to reach up into the crevice, so I slipped the handle into a 9-inch piece of half-inch PVC pipe—that sort used in lawn irrigation—to extend the ratchet.
You’ll now have to feel around back of the hidden lower bolt, but with a little jiggling, swearing and, by aligning the socket with the visible front part of the nut/bolt assembly, you’ll eventually grab hold, and the rest is fairly straightforward.
Once you have both bolts out, be careful not to drop the starter. It weighs about 30 pounds, so you’ll have to exercise some muscle. To remove the starter, lower it and slip it out beneath the oil filter.
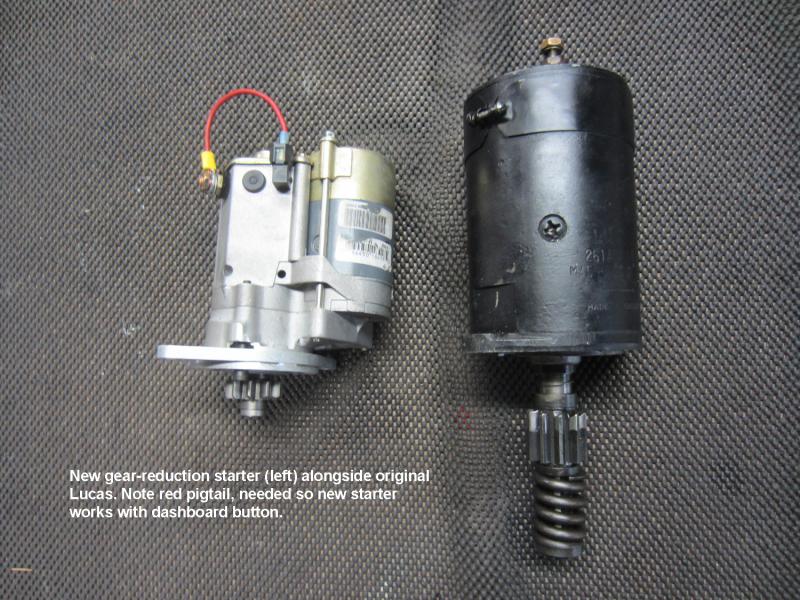
Okay. If you’re going to install a rebuilt Lucas starter, it’s pretty much a job of reversing the above procedure with a little more swearing. In my case, I chose to buy what’s called a gear-reduction starter. I bought mine from Terry’s Jaguar Parts in Michigan. It’s a rebuilt Nippondenso unit and cost $217 with shipping. (I’ve seen them since at lower prices.)
One advantage of a gear-reduction starter is that it’s lighter—about 15 pounds. It’s also said to spin the engine faster and use less juice, but those are arguable points.
Couple of things to remember about the Nippondenso starter. First, to make it work with your dashboard starter button, you have to fabricate a short wire that runs from a flat connector on the new starter to the cable bolt on the starter itself (see photo below). Hook up this short wire before you try to install the starter.
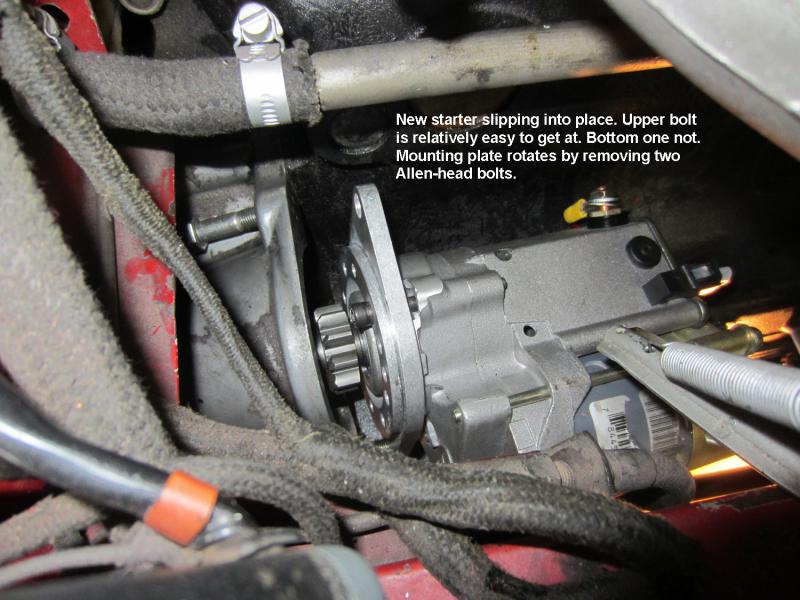
Second—and this is something no one tells you—the mounting plate of the new starter rotates. I tried for several hours to mount the Nippondenso starter with the plate in its shipped position, and I simply couldn’t make it fit. The starter was too wide; it wouldn’t clear one of the structural members. I tried mounting it right side up, upside down, every which way. No go.
I finally figured out that if you remove the two black Allen-head bolts that hold the mounting plate to the starter and rotate the plate, you’ll eventually find a position that’ll work. Again, installation is the reverse of removal. Because the Nippondenso starter is a bit shorter than the Lucas, you have to extend the starter cable by loosening it up near the radiator. Be sure, though, that the cable clears the fan and fan pulley, because otherwise those moving parts will rub through the insulation. I managed to buy the flat black button straps that Jaguar used to hold things in place, so it all looks fairly original.
As for the non-OEM starter, you’ll never see it unless you look really hard. My car starts fine. The new starter sounds different, and I think the engine might fire a touch more quickly, but that could just be wishful thinking.
Submitted by Anonymous (not verified) on Mon, 11/28/2016 - 19:24
Nice write-up, Thanks
Bob